Timeline all
#15
#12

#6
De splitsing
Last year I spent a lot of evenings writing a script for a play I had in mind. And finally it's there, the first production is coming the first weekend of december. You are all invited! If you don't understand dutch, make your own story while watching, who knows we come up with an idea for another play :) More information and tickets reservation are available on okermaan.be

Configuration split: deploy subsets of configuration in Drupal 8
From the Configuration split project page: "The Drupal 8 configuration management works best when importing and exporting the whole set of the sites configuration. However, sometimes developers like to opt out of the robustness of CMI and have a super-set of configuration active on their development machine and deploy only a subset. The canonical example for this is to have the devel module installed or having a few block placements or views in the development environment and then not export them into the set of configuration to be deployed, yet still being able to share the development configuration with colleagues."
This small utility module for Drupal 8 allows you to exactly achieve this use case (and many others). I will cover two common scenarios, explaining how to configure your site and which commands you need to run:
- Have (development/ui) modules installed on your dev environment, uninstalled on production
- Have modules installed on your production environment, but not on development
Configuration split 101
Configuration split exposes a configuration entity which controls what you want to split off. Currently you can
- blacklist modules: any configuration that this module owns will automatically be blacklisted too.
- blacklist configuration: settings or configuration entities. These will be removed from the active sync directory.
- graylist configuration: settings or configuration entities. These will not be removed if they are in the active sync directory, but also not exported if they are not there yet. I won't cover this functionality in this article post, that will be for another time.
After you configured one or more configurations split entities, you can use the drush commands to export and import configuration, based on one or more of those config entities. When it comes to exporting configuration, you can not use the existing drush core command (config-export / cex). Using drush config-import (cim) or the UI to import may still be used, but this depends on your setup. Drupal Console commands are under revision. Important: since feb 2017, due to https://www.drupal.org/node/2855319 and https://github.com/drush-ops/drush/pull/2471, you can use the standard drush commands without any problems!
Each config split entity defines the directory in which the splitted configuration will live in case there are some. Not all modules define configuration, so there's a possibility that this directory is empty after you do an export.
An important technical aspect is that the module does not interfere with the active configuration but instead filters on the import/export pipeline. What simple happens is this: just before the actual writing, it will check the configuration and remove any entries that you don't want to be there. Then your active configuration is written away. Config that doesn't belong into the active configuration will be moved to separate directory. On import, the opposite happens: it will merge settings back in and set modules to the installed state just before core configuration then starts importing.
Last, but not least: you can swap the config.storage.sync service so that the synchronize screen will use the config split config entities for importing. More information is in the README file and in the video.
Scenario 1: modules installed on dev, not on production
Step 1
After you installed the module, go to 'admin/config/development/configuration/config-split' and click on 'Add configuration split'. Naming is important, so we'll enter 'Dev split' as the name for this configuration. We'll also create a directory called 'sync-dev-split'. Now toggle the modules that you don't want to have installed on production. In this case, we're going to blacklist Devel, Devel Kint, Field UI, Views UI and database logging. Additionally, also toggle system.menu.devel. This configuration is owned by the system module, so there's no dependency on the devel module. There's no problem having this config on your production site though, so it's not required to blacklist it.
Optionally, you can also blacklist the configuration split module because it doesn't necessarily have to be installed on production. We're not doing that here, because in the second scenario, we're building further on this one and we want to have it installed on the production environment as well.
Step 2
Go to your command line interface and run following command:
swentel@dev:/home/drupal/drupal-core$ drush csex --split=dev_splitThe split option is not required, but when starting to work with the module, it helps you to know which config split will be used for this command. It's possible to override the status of any config split config entity so that eventually, you can omit the split option. Sadly enough, you don't get any feedback (yet), but after the command has run you should see various files in your sync-dev-split directory:
swentel@dev:/home/drupal/drupal-core$ ls sync-dev-split/
dblog.settings.yml  devel.settings.yml  field_ui.settings.yml  system.menu.devel.yml
Step 3
You can now commit your active sync and go to production. You don't necessarily have to put the sync-dev-live directory in your version control because production doesn't need to know about these files at all. Once you have pulled on production, go to the synchronize screen to verify what is staged. You will see that the setting files will be removed and core.extension will be changed uninstalling the development modules and installing configuration split. Since we only have one config split configuration, you can hit 'Import all' here or run drush config-import, (which is the drush core command). Note that if you don't use the UI, you can blacklist the configuration manager module as well.
You might wonder why we don't use the 'config-split-import' command from the module itself: this would import the active sync directory and also include the modules and settings again that we have blacklisted. And that's not what we want. This seems confusing at first, but ultimately, if this is your setup, you just keep on using the core / drush commands to import your staged configuration on production.
# This command can be used now, but not anymore further on when we will add scenario 2.
swentel@live:/home/drupal/drupal-core$ drush cim
Scenario 2: modules installed on production, not on dev
Step 1
This scenario builds further on the first one. Config split is now installed on our live website. Create a new config split configuration called 'Live split'. You will need a new directory for this second config split, so make sure it's there. On production we still want to log events and for that we're going to use the syslog module. Install the module, so that we can now blacklist it for the live split configuration.
Step 2
Go to your command line interface and run following commands:
swentel@live:/home/drupal/drupal-core$ drush csex --split=live_splitAgain, no feedback here, but after the command has run you should see the syslog settings file in your sync-live-split directory:
swentel@live:/home/drupal/drupal-core$ ls sync-live-split/
syslog.settings.yml
Doing exports and imports on dev or live
From now on, if you want to import new settings whether it's on your dev or live environment, you can not use the drush core commands anymore. Use following commands:
# to export on your dev environment
swentel@dev:/home/drupal/drupal-core$ drush csex --split=dev_split
# to import on your dev environment
swentel@dev:/home/drupal/drupal-core$ drush csim --split=dev_split
# to export on your live environment
swentel@live:/home/drupal/drupal-core$ drush csex --split=live_split
# to import on your live environment
swentel@live:/home/drupal/drupal-core$ drush csim --split=live_splitThe future
Please join us in the issue queue because there's still some work:
- Optimize the user interface and allow wildcards
- Add confirmation and feedback in the drush commands
Ultimately, this functionality should live in core. A core issue to discuss this is at https://www.drupal.org/node/2830300.
Stop telling users that another user has modified the content in Drupal 8
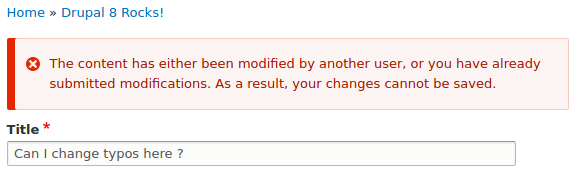
Every Drupal developer knows the following error message (maybe some by heart): The content has been modified by another user, changes cannot be saved. In Drupal 8 the message is even a bit longer: The content has either been modified by another user, or you have already submitted modifications. As a result, your changes cannot be saved. While this inbuilt mechanism is very useful to preserve data integrity, the only way to get rid of the message is to reload the form and then redo the changes you want to make. This can be (or should I say 'is') very frustrating for users, especially when they have no idea why this is happening. In an environment where multiple users modify the same content, there are solutions like the Content locking module to get overcome this nagging problem. But what if your content changes a lot by backend calls ?
On a big project I'm currently working on, Musescore.com (D6 to D8), members can upload their scores to the website. On save, the file is send to Amazon where it will be processed so you can play and listen to the music in your browser. Depending on the length of a score, the processing might take a couple of minutes before it's available. In the meantime, you can edit the score because the user might want to update the title, body content, or add some new tags. While the edit form is open, the backend might be pinging back to our application notifying the score is now ready for playing and will update field values, thus saving the node. At this very moment, the changed time has been updated to the future, so when the user wants to save new values, Drupal will complain. This is just a simple example, in reality, the backend workers might be pinging a couple of times back on several occasions doing various operations and updating field values. And ironically, the user doesn't even have any permission to update one or more of these properties on the form itself. If you have ever uploaded a video to YouTube, you know that while your video is processing you can happily update your content and tags without any problem at all. That's what we want here too.
In Drupal 8, validating an entity is now decoupled from form validation. More information can be found on the Entity Validation API handbook and how they integrate with Symfony. Now, the validation plugin responsible for that message lives in EntityChangedConstraint and EntityChangedConstraintValidator. Since they are plugins, we can easily swap out the class and depending on our needs only add the violation when we really want to. What we also want is to preserve values of fields that might have been updated by a previous operation, in our case a backend call pinging back to tell us that the score is now ready for playing. Are you ready ? Here goes!
Step 1. Swap the class
All plugin managers in Core (any plugin manager should do that!) allow you to alter the definitions, so let's change the class to our own custom class.
<?php
/**
 * Implements hook_validation_constraint_alter().
 */
function project_validation_constraint_alter(array &$definitions) {
  if (isset($definitions['EntityChanged'])) {
    $definitions['EntityChanged']['class'] = 'Drupal\project\Plugin\Validation\Constraint\CustomEntityChangedConstraint';
  }
}
?>
For the actual class itself, you can copy the original one, but without the annotation. The constraint plugin manager doesn't need to know about an additional new one (unless you want it to of course).
<?php
namespace Drupal\project\Plugin\Validation\Constraint;

use Symfony\Component\Validator\Constraint;

/**
 * Custom implementation of the validation constraint for the entity changed timestamp.
 */
class CustomEntityChangedConstraint extends Constraint {
  public $message = 'The content has either been modified by another user, or you have already submitted modifications. As a result, your changes cannot be saved. In case you still see this, then you are really unlucky this time!';
}
?>
Step 2: alter the node form
We want to be able to know that a validation of an entity is happening when an actual form is submitted. For this, we're adding a hidden field which stores a token based on the node id which we can then use later.
<?php
/**
 * Implements hook_form_BASE_FORM_ID_alter() for \Drupal\node\NodeForm.
 */
function project_form_node_form_alter(&$form, &$form_state) {
  /** @var \Drupal\Node\NodeInterface $node */
  $node = $form_state->getFormObject()->getEntity();
  if (!$node->isNew() && $node->bundle() == 'your_bundle' && $node->getOwnerId() == \Drupal::currentUser()->id()) {
    $form['web_submission'] = [
      '#type' => 'hidden',
      '#value' => \Drupal::csrfToken()->get($node->id()),
    ];
  }
}
?>
Step 3: Validating the entity and storing an id for later
We're getting to the tricky part. Not adding a violation is easy, but the entity that comes inside the constraint can't be changed. The reason is that ContentEntityForm rebuilts the entity when it comes in the submission phase, which means that if you would make any changes to the entity during validation, they would be lost. And it's a good idea anyway as other constraints might add violations which are necessary. To come around that, our constraint, in case the changed time is in the past, will verify if there is a valid token and call a function to store the id of the node in a static variable which can be picked up later.
<?php
namespace Drupal\project\Plugin\Validation\Constraint;

use Symfony\Component\Validator\Constraint;
use Symfony\Component\Validator\ConstraintValidator;

/**
 * Validates the EntityChanged constraint.
 */
class CustomEntityChangedConstraintValidator extends ConstraintValidator {

  /**
   * {@inheritdoc}
   */
  public function validate($entity, Constraint $constraint) {
    if (isset($entity)) {
      /** @var \Drupal\Core\Entity\EntityInterface $entity */
      if (!$entity->isNew()) {
        $saved_entity = \Drupal::entityManager()->getStorage($entity->getEntityTypeId())->loadUnchanged($entity->id());
        // A change to any other translation must add a violation to the current
        // translation because there might be untranslatable shared fields.
        if ($saved_entity && $saved_entity->getChangedTimeAcrossTranslations() > $entity->getChangedTimeAcrossTranslations()) {
          $add_violation = TRUE;
          if ($entity->getEntityTypeId() == 'node' && $entity->bundle() == 'your_bundle' &&
            $this->isValidWebsubmission($entity->id())) {
            $add_violation = FALSE;

            // Store this id.
            project_preserve_values_from_original_entity($entity->id(), TRUE);
          }

          // Add the violation if necessary.
          if ($add_violation) {
            $this->context->addViolation($constraint->message);
          }
        }
      }
    }
  }

  /**
   * Validate the web submission.
   *
   * @param $value
   *   The value.
   *
   * @see project_form_node_form_alter().
   *
   * @return bool
   */
  public function isValidWebsubmission($value) {
    if (!empty(\Drupal::request()->get('web_submission'))) {
      return \Drupal::csrfToken()->validate(\Drupal::request()->get('web_submission'), $value);
    }

    return FALSE;
  }

}

/**
 * Function which holds a static array with ids of entities which need to
 * preserve values from the original entity.
 *
 * @param $id
 *   The entity id.
 * @param bool $set
 *   Whether to store the id or not.
 *
 * @return bool
 *   TRUE if id is set in the $ids array or not.
 */
function project_preserve_values_from_original_entity($id, $set = FALSE) {
  static $ids = [];

  if ($set && !isset($ids[$id])) {
    $ids[$id] = TRUE;
  }

  return isset($ids[$id]) ? TRUE : FALSE;
}
?>
Step 4: copy over values from the original entity
So we now passed validation, even if the submitted changed timestamp is in the past of the last saved version of this node. Now we need to copy over values that might have been changed by another process that we want to preserve. In hook_node_presave() we can call project_preserve_values_from_original_entity() to ask if this entity is eligible for this operation. If so, we can just do our thing and happily copy those values, while keeping the fields that the user has changed in tact.
<?php
/**
 * Implements hook_ENTITY_TYPE_presave().
 */
function project_node_presave(NodeInterface $node) {
  if (!$node->isNew() && isset($node->original) && $node->bundle() == 'your_bundle' && project_preserve_values_from_original_entity($node->id())) {
    $node->set('your_field', $node->original->get('your_field')->value);
    // Do many more copies here.
  }
}
?>
A happy user!
Not only the user is happy: backends can update whenever they want and customer support does not have to explain anymore where this annoying user facing message is coming from.
Mobile support for chosen
Note: this patch is quite old, so be aware there might be errors on the latest version on chosen.
Chosen is a jQuery plugin which makes select boxes more user-friendly. Currently, support is disabled on mobile devices for various reasons. Enabling the support requires a hack in the source code for now in the AbstractChosen.browser_is_supported function to return true when the userAgent finds Android or iPhone/iPad. You can download the patched version at the bottom (or detail) of the article. The current version is 1.1.0
Chosen will now be enabled on mobile, but touching the element will not work nicely since the plugin doesn't listen for the touchstart event to trigger the functionality. Opening the select box requires touching the element for at least a couple of seconds, which isn't really user-friendly. Luckily, there's an easy way to get around this by writing a couple lines of javascript:
    // Chosen touch support.
    if ($('.chosen-container').length > 0) {
      $('.chosen-container').on('touchstart', function(e){
        e.stopPropagation(); e.preventDefault();
        // Trigger the mousedown event.
        $(this).trigger('mousedown');
      });
    }
That's it, fully functional chosen support on mobile devices!
| Attachment | Size |
|---|---|
| chosen.jquery.min_.js.txt | 26.33 KB |