Timeline

#162
#161
#160

Privacy friendly phone, desktop and services
This is a living document, I'll update if things change in the future.
Why
It started as an exercise to start replacing applications and (free) services with open source variants. As I'm using Android phone for all these years, getting rid of Google was the hardest part, even though I don't necessarily have a big problem with them. Given how much you can control in your settings, they are doing a good job. This made the exercise quite interesting because I had no clue anymore how many dependencies I had on them. Besides that, I simply started to hate the additional layers that Android comes with, plus additional applications which come from the vendors as well on your phone. It should be easier to control this, which simply is not the case anymore.
The most fun part so far was discovering many fun and handy applications out there that exactly do one thing perfectly. Especially playing with GPS utilities was rewarding.
Food for thought
This might not apply to your personal situation, but below are some general digital principles I try to live by.
- Don't use main stream services: no WhatsApp, Facebook, Slack and so on for me. I really don't miss anything at all (au contraire), and there are good replacements for communication. Signal comes to mind, and the list of people I know using it is steadily growing.
- Work: don't read your e-mail or sync your calendar on the phone. I've stopped doing this for almost a year now and it's extremely liberating. Ideally, my next phone also comes with two sim card slots so I can start using a dedicated professional phone number.
- Use your own domain for your website and go IndieWeb. It still allows you to broadcast to external services like Twitter, or (even better), the Fediverse.
Data management
To store, sync and backup my personal data, I've setup a private Nextcloud instance. It manages my files, contacts and calendar. More extensions are available which I still have to discover, but the important ones are covered. My partner also has an account and uses it to manage her work and our shared calendar.
My e-mails provider is Combell where my personal domain is registered.
Phone
Running /e/ on a Fairphone which is really smooth. In all fairness, I do like the look and feel of LineageOS a bit more, but it's still great. The Pine64 is also interesting, but then for the laptop only since I've tried an Ubuntu based phone in the past which was quite disappointing.
Applications
- General: Signal, K-9 Mail, VLC, Open Camera, Simple mobile tools calendar, andOTP, Jitsi Meet, Element, Nextcloud (with DAVx5), c:geo.
- Ad blocking: personalDNSfilter. Works amazing and has great flexibility. I've also added 0.0.0.0 *.facebook.com. I smiled when I added that line.
- I'm not a fan of the default launcher, so I run a slightly modified version of the Trebuchet launcher from LineageOS.
That's practically the full list I have installed. I'm hardly distracted anymore by my phone, apart from playing Wordfeud which is a big hit with the family. Feel free to challenge me, swentel is my username.
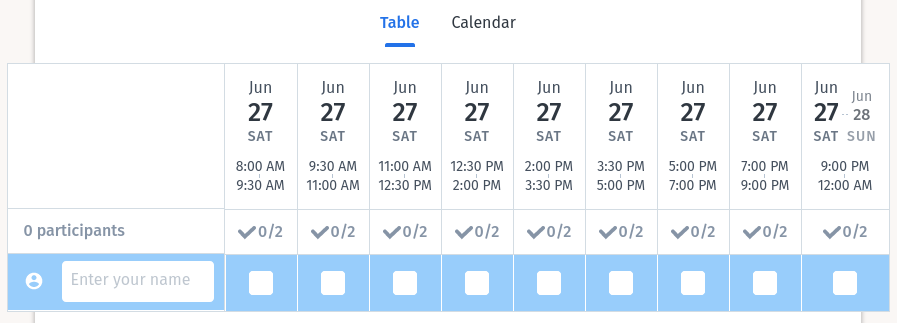
Itsme could be installed using the Aurora store. It's a useful tool to login into my bank accounts or government services. I still think they should offer a non mobile solution, like. e.g. Signal desktop has, because relying on a phone alone is annoying and a bit weird IMO. (Look again at the second introduction movie, it even becomes more weirder in my opinion: someone working on a tablet, then having to switch to a phone .. really .. it's just silly).
Desktop
OS: Ubuntu. I've been a long time Redhat/Fedora user, but switched a few years ago as I experienced too many hassles when upgrading. Check your dash settings and optionally motd-news too. I might switch back one day though, or go to XUbuntu, you never know. Qubes OS has been on my radar for a while as well, especially as Android support is on the roadmap.
Applications
- General: Evolution (mail, contacts), Signal desktop, Nextcloud sync, Libre Office, Glimpse, OTPClient, Element, KeepassX and supergenpass bash. Using Jitsi web for video conferencing.
- Ads blocking: manage my hosts file with the excellent project by Steven Black. Pi-hole is on the radar so I can protect my entire network even better.
- Element: Matrix client.
- HexChat: yes, I'm still on IRC, connected with the freenode network, usually on most #indieweb channels. Now and then I login into drupalchat.eu, but happens rarely.
- GPS babel and GpsPrune: utitilies to read activities from my Garmin Instinct watch and convert gpx files. This is enough so I don't need a Garmin account or the Garmin apps to sync tracks, waypoints or courses.
#156

Offline speech to text to trigger custom commands on Android with Kaldi and Vosk
Speech to text on Android usually means using the built-in speech recognizer which connects with Google cloud. Offline recognition is possible too, and, let's be honest, support for 120 languages is pretty impressive. However, I'd like to experiment, and also be as consistent as possible when it comes to building and using open source, so I started looking for alternatives. I can't remember how long ago I went to at least page 5 or 6 in search results, but I suddenly stumbled onto Kaldi and Vosk.
The use case for speech to text for me is simple: voice commands. I'm currently building an app, nicknamed Solfidola. It's still in early state1, but the main goal is to create an app to learn Solfege. It's an interesting project from a technology point of view: render music sheets, place notes on the right position in the bar, play them with the right pitch and interval and getting soundfonts working with the midi drivers. You can create exercises to test one or more intervals, and this is where I wanted to introduce the voice commands: say you create an exercise with 3 intervals, you are presented with those 3 choices. And when you hear the interval, I wanted to be able to speak the position of the solution by just saying one, two or three. Or say 'play' to hear the interval again. That's it, and thanks to Kaldi it works beautifully now!
The implementation
An example Android app is available at Kaldi Android Demo on GitHub which ships with the Kaldi library and a small English model. The two most important methods are onPartialResult() and onResult() from the RecognitionListener interface which return results from the STT engine. The string comes back as JSON, so it involves a bit of parsing first before you can take action.
    @Override
    public void onResult(String s) {
        String match = "";

        try {
            JSONObject o = new JSONObject(s);
            if (o.has("text")) {
                match = o.getString("text");
                // We have a result, check if we can push a button.
                checkSolutionFromSpeech(match);
            }
        }
        catch (JSONException ignored) { }

    }
The checkSolutionFromSpeech() method then goes on to check whether the word that came back matches a solution and gives feedback whether you are right or wrong. See the source for more inspiration for your own application.
Making the model smaller
The English2 language model is relatively large, around 50MB. Since I only need a few words to be recognized, I wondered whether it was possible to make it smaller. Turns out it's not that hard once you have Kaldi installed on your machine. Tip: in case you install Kaldi from source, only compile the tools folder, that's all you need for making the model smaller using only the words you need.
The steps are described in the Vosk adaptation document (previously in adaptation.md on GitHub, that file is now available to download at the bottom). I created a 'text.txt' file which contains about 15 words at the moment, ran the commands which saves me about 20MB of storage for the app, which is a great deal!
I'd like to take a step further and try and figure out whether it's possible to save more storage in either the model or the kaldi aar library. But, first things first, I need to practice my interval recognition now :)
Footnotes
1. If you're interested in testing, contact me and I can add you to the alpha program!2. Models for other languages are available at Vosk models page.
| Attachment | Size |
|---|---|
| Original adaption file | 1.35 KB |
#154
#144
#141
It's raining toilet paper! Awesome video by Olivier Antignac, Belgium VFX artist - https://www.instagram.com/atc_vfx/ - posted with his permission. #toiletpaper
#140
#123
#113
"Unterleuten" by Juli Zeh will probably be the best book I've read this year. The site also has a ground plan of the village, pretty awesome: https://unterleuten.de - Kudos to @amvlaming as well for the Dutch translation!
#111
#97
#92
#80


Send me a webmention with Drupal!
After months of reading, experimenting and a lot of coding, I'm happy that the first release candidate of the Drupal IndieWeb module is out. I guess this makes the perfect time to try it out for yourself, no? There are a lot of concepts within the IndieWeb universe, and many are supported by the module. In fact, there are 8 submodules, so it might be daunting to start figuring out which ones to enable and what they exactly allow you to do. To kick start anyone interested, I'll explain in a few steps how you can send a webmention to this page. Can you mention me?
Step 1: enabling modules
After you downloaded the module and installed the required composer packages, enable following modules: IndieWeb, Webmention and Microformats2. In case you are not authenticated as user 1, also toggle the following permissions: 'Administer IndieWeb configuration' and 'Send webmention'.
Step 2: expose author information
To discover the author of a website after receiving a webmention, your homepage, or the canonical url of a post needs author information. The module comes with an Author block so you can quickly expose a block where you can configure your name. Your real name or nickname is fine, as long as there's something. The minimal markup should look like something like this:
<p class="h-card">Your <a class="u-url p-name" rel="me" href="https://example.com">name</a></p>Note: this can be anywhere in your HTML, even hidden.
Step 3: configure webmention module
All configuration exposed by the modules lives under 'Web services' > 'IndieWeb' at /admin/config/services/indieweb. To configure sending webmentions go to /admin/config/services/indieweb/webmention/send. Ignore the ' Syndication targets' fieldset and scroll down to ' Custom URL's for content' and toggle the 'Expose textfield' checkbox.

Scroll down a bit more and configure how you want to send webmentions, either by cron or drush (webmentions are stored in a queue first for performance reasons)

Step 4: configure Microformats module
When sending a webmention to me, it would be nice to be able to figure out what exactly your post is. To achieve this, we need to add markup to the HTML by using CSS classes. Let's configure the minimal markup at /admin/config/services/indieweb/microformats by toggling following checkboxes:
- h-entry on node wrappers
- e-content on standard body fields. In case your node type does not use the standard body field, enter the field name in the 'e-content on other textarea fields' textarea.
- dt-published, p-name, u-author and u-url in a hidden span element on nodes.
Now create a post!
Create a post with a title and body. Your body needs to contain a link with a class so that when I receive your webmention, I know that this page is valid. As an example, we're going to write a reply:
Hi swentel! I just read your <a href="https://realize.be/blog/send-me-webmention-drupal" class="u-in-reply-to">article</a> and it's awesome!Save the post and verify the markup more or less looks like underneath. Make sure you see following classes: h-entry, u-url, p-name, dt-published, e-content, u-author.
<article role="article" class="h-entry node node--type-article node--promoted node--unpublished node--view-mode-full clearfix">
  <header>
     <div class="node__meta">
        <span>
          Published on <span class=" field--label-hidden">Tue, 04/12/2018 - 22:39</span>
        </span>
        <span class="hidden">
          <a href="https://example.com/canonical-url" class="u-url">
            <span class="p-name">Test send!</span>
            <span class="dt-published">2018-12-04T22:39:57+01:00</span>
          </a>
          <a href="/" class="u-author"></a>
        </span>
      </div>
      </header>
  <div class="node__content clearfix">
  <div class="e-content clearfix ">Hi swentel! I just read your <a href="https://realize.be/blog/send-me-webmention-drupal" class="u-in-reply-to">article</a> and it's awesome!</div>
  </div>
</article>
If everything looks fine, go to the node form again. Open the 'Publish to' fieldset where you can enter 'https://realize.be/blog/send-me-webmention-drupal' in the custom URL textfield. Save again and check the send list at /admin/content/webmention/send-list. It should tell that there is one item in the queue. As a final step, run cron or the 'indieweb-send-webmentions' drush command. After that the queue should be empty and one entry will be in the send list and I should have received your webmention!
Note: You can vary between the 'u-in-reply-to', 'u-like-of' or 'u-repost-of' class. Basically, the class determines your response type. The first class will create a comment on this post. The other two classes will be a mention in the sidebar.
What's next?
Well, a lot of course. But the next step should be receiving webmentions no? If you go to /admin/config/services/indieweb/webmention, you can enable receiving webmentions by using the built-in endpoint. Make sure you expose the link tag so I know where to mention you!
I tried it, and it didn't work!
Maybe I missed something in the tutorial. Or you have found a bug :) Feel free to ping me on irc.freenode.net on #indieweb-dev or #drupal-contribute. You may also open an issue at https://github.com/swentel/indieweb
#76

#75

#73
Slides for my #IndieWeb session at #drupalcampbe are available at https://realize.be/slides/1 #drupal